My Summer Photo Project: Portrait Photography
One of my goals for the year was to take pictures of a different friend every week in order to learn more about portrait photography. For me, summer went from Memorial Day to Labor Day and that means my adventure is over. And you know what? I learned a heck of a lot. It really is amazing how much more you can learn on the job as opposed to reading websites.
Part One
Part one was written after I completed my first four photo sessions.
Photo Session #1: Ryan
What I learned: This is probably the most pratical lesson that I’ll learn, do not wear a tight skirt while taking pictures. You can’t move nearly as much as you need to. Also, a week after I took these photos I had my boudoir shoot. It was there that I learned that the photographer should come prepped with poses and learn how to tell the subject how to move.
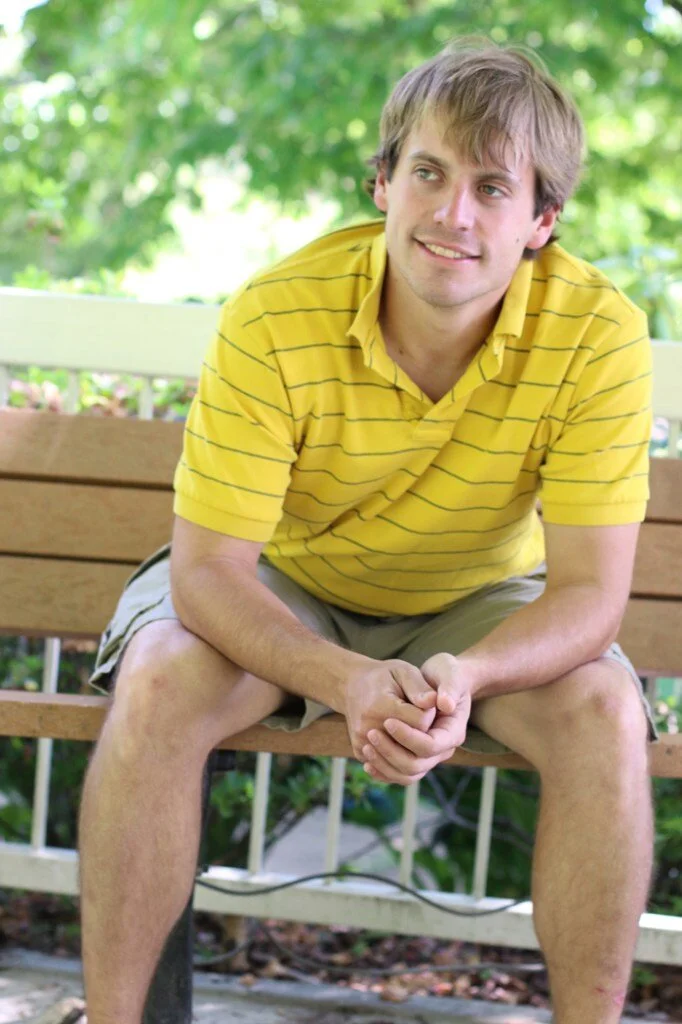


Photo Session #2: Janalyn
What I learned: I learned more about posing. I learned that it’s okay to try something that doesn’t work. I learned that it’s easier to take photographs when you’re above or on the same level as somebody else – lower created interesting angles. I learned that it’s fun if the subject has a prop because it gives you something external to work with. I remembered the joy of black and white photography. Also, I confirmed that there are certain pictures that I really like even though they are blurry.


Photo Session #3: Zoha
What I learned: We wandered the city taking pictures, which was fun because the background was ever changing. It was also during this shoot that I started to develop what I believe to be my shooting style – I talk constantly. It makes me feel more comfortable, and I think it puts the other person at ease as well because it makes things seem less formal. Also, I really like close up shots of people, it makes for some fun pictures.


Photo Session #4: Vania
What I learned: This girl knows posing. It’s impressive. She had so many ideas that I tried to take in so I could remember them next time. I also had more fun with facial expressions. I think I’m going to have a few go tos – the Home Alone face, tongue sticking out, looking really excited, and being pensive. We’ll see what else I can add to the list.


What’s Next?
Well, it was after Vania’s photoshoot that I finally read the manual for my camera. I learned that some of the shots were wide angle because I was accidentally shooting in video mode. I also learned how to manual focus – it’s not as intuitive as it was on my last camera, so I wasn’t using it. I also bought the Photography Concentrate course called Really Easy Retouching, which I’m excited to take (when I find some time). I also want to try shooting another boy sometime soon, I feel like masculine poses are harder to come up with – it will probably involve browsing some GQ magazines. We’ll see what comes next. My co-workers have been very good sports about posing for me – so we’ll see exactly who I can talk into it this week.
What have I learned from this experience overall? I have pretty friends.
Part Two
Part two was written after taking photos of five additional friends.
Photo Session #5: Karyn
The goal: After the last shoot, I had finally read my camera’s manual – so my goal of this shoot was to learn how to better focus on the subject.
What I learned: Always check the weather. Actually, I did check the weather, but it still surprised us. Karyn and I actually got rained on before the shoot even started so we went to grab brunch and then we took pictures. I also learned that I like having some kind of one on one time with the person that I’m shooting beforehand to get to know them a little better or catch up with them and hear how life is going these days. It’s all about the experience. Also, Karyn’s a musician – so it was great to get her into some poses that mimicked things she would do on stage. Always think about a person’s passions while shooting them.


Photo Session #6: Stephen
The goal: Find poses that work for males before doing a photo shoot of Doug. Note: this shoot was on a Thursday night and Doug’s was on a Friday afternoon.
What I learned: Go to poses for men mostly involve (1) arms crossed or (2) hands in pockets with a few variations. Also, if you’re going to photo shoot in the late evening, make sure that the location you shoot in isn’t in the middle of a bunch of buildings and trees blocking all possible light. Also. Goodness gracious, you would have thought I’d have figured this out by now – but if you’re going to back up more than 5 feet, remember to turn the f-stop above 2, otherwise everything will be a hot mess of blurry.


Photo Session #7: Doug
The goal: Don’t mess up. Yes, I know this sounds simple, but sometimes you’ve got to keep it simple. Doug was my professor in college, so I felt like the pressure was on a little bit. Please note that it was actually the chillest shoot ever and we walked around the University of Pennsylvania’s campus and he humored me by trying random photos. Made me feel silly for ever being nervous.
What I learned: If you’re really nervous about something, prepare the best you can. I checked out a lot of websites beforehand about posing and actually showed up to the campus early to scope out possible spots to take pictures in. It made me feel more relaxed and ready for the shoot.


Photo Session #8: Marie
The goal: Make sure Marie knows how awesomely pretty she is
What I learned: When I started this adventure I thought that I was embarking on a skill that involved a camera. What I learned along the way was that it involves a camera, it involves posing, and it involves psychology. There are so many things. Being a photograph subject is about feeling pretty by giving them confidence and the tools to be great. (or handsome, or sexy, or hot, or beautiful, or cute, or dreamy – please see this post if you have no idea what I’m talking about) At the beginning of the photo shoot I found a few key pictures of Marie that she looked stunning in and showed them to her. Definitely gave her a little bit of a pep in her step for the rest of them and made the shoot a lot of fun. Also, direct sunlight can create some harsh shadows, I’m going to try to avoid those from now on.


Photo Session #9: Carly
The goal: Take a professional headshot
What I learned: There are some poses that are powerful and there are other poses that aren’t so powerful. If the pose is something that someone standing in the corner at a party would feel comfortable doing, it’s probably not a powerful pose. Also, this was the first photo shoot where props and outfit changes were used. It was surprisingly easy to go between looking casual and professional with the addition or removal of a blazer. She also brought a really fun hat for some of the more casual shots.


What’s Next
I’ve got a list going at this point. I’m in the process of putting together a price list for photo shoots in the future if you should find yourself interested or in the Philadelphia area. I’ll let y’all know when this service is available. In the meantime, there’s a few more types of shoots that I want to do for free in order to get a better handle on including: newborn photography, family shots, and engagement shots.
Also, I’m going to photo shoot Ryan (my first subject) one more time to see the difference between the first and last shoot to make a total of 10. After I do that, I’ll post about my top 10 tips about what I’ve learned.
I also want to get more comfortable using props and learning about how to better use them.
I also may have signed up for this one-day photography conference on a whim. Oops.
Lessons Learned
Last weekend I finally got the chance to take pictures of my friend Ryan again. You may recall that Ryan was the first person that I took pictures of during my summer photo project. I decided the only way to know exactly how much better I got was by doing the same shoot I did the first time again. It’s actually crazy how much more confidence I gained in just a few months. I wanted to share with you some of the photography lessons learned I experienced throughout this process.
Knowledge
Fun fact, I didn’t read my camera manual until the third or fourth photoshoot that I did this summer. Big mistake. I was missing some super key facts like – how to focus, the difference between taking pictures in video-mode and photo-mode, how to use the touch screen – really simple things that made a world of difference. I shot the entire summer using my 50mm f1.4 lens and I absolutely love it. Next I’m going to work on mastering a zoom lens, I still need to decide which one though.
Location
The first time I took photos of Ryan, we ended up in a park – a small park where every place you turn it looks busy. I had no idea how to handle this then, and to be honest, I’m not sure I’d know what to do with it now. I did learn that I really like shooting with a more city-esque background. The lines are cleaner.

Attire
This is a two part one. The first time I took pictures of Ryan I wore a just-above-the-knee length skirt. BIG mistake. I couldn’t get into any position gracefully to take a photograph. This time I wore jeans. MUCH better. The second part of this has to do with what Ryan is wearing. I didn’t bring up attire beforehand because he didn’t ask. Other people have asked what they should wear. I learned really fast not to say anything along the lines of “whatever makes you feel pretty/sexy/insert-good-looking-adjective-here”. I still don’t exactly know what to say, but I do know what not to say now. Oh, and lucky for me, Ryan decided to wear something that awesomely complimented his eyes and skintone this time, as opposed to bright yellow…

Lighting
Oh goodness, lighting. I haven’t been doing this very long, but I can almost safely say is every photographer’s most loved and hated technicality. Constant, not harsh lighting is wonderful, the golden hour is delightful, shadowy harshness creating all sorts of shapes all over your subject – horrible. The first shoot Ryan and I kept aiming for wherever we could find light, even if that light was spotty. This time around Ryan actually said to me “I feel like you’re trying to keep me in the dark” – he was just being a pain in the butt. Being in the “dark” creates a much more smooth looking photo though – where you can actually see the person’s face. And by dark, I mean well-lit shade.

Black and White
I don’t know why it took so long for me to remember that black and white photography existed, it’s a good way to cover a number of sins. I actually didn’t make any shots black and white last time for some reason, but I got a few good ones this time around. Here’s an example of this time:

Here’s an example of one that I would have done from the last batch.

Posing Ideas
Goodness gracious, guys. Posing is hard. Not only is posing hard, but figuring out how to tell people to pose and to make them feel comfortable. I’ve spent so much time reading posts like this, and this, and this. It’s still going to take a lot of practice, but I’m getting better. Oddly enough, me making funny faces always seems to work. The first time I took pictures of Ryan, he was pretty much in the same pose the entire time. The second time I figured out three easy poses and them tweaked each one slightly, but overall the whole reel looked a lot different.

Photoshop
I didn’t realize when I said I was going on a Photography mission that I was also going to be going on a Photoshop mission. There have been a handful of resources that have been priceless to me. Photography Concentrate is absolutely wonderful. They offer a bunch of different tutorials that are very well-done and easy-to-follow. Two that I have bought and loved so far are Extremely Essential Camera Skills to get better at understanding manual and Really Easy Retouching. I also love getting their newsletter every month – so informative, with such good tips. Here’s a before and after done on Photoshop skills alone.

Keep Learning
This one is a lot of fun. In the past few months I’ve gotten the chance to be other people’s models to learn what it feels like to be the posee (as opposed to the poser), I’ve been reading Click Magazine (affiliate link alert) to get ideas for capturing great moments, and I went to an all-day conference. Each of these experiences has made me a better photographer and has taught me something about what I like and don’t like in my own photography. I realize I’ve been holding out on you about the all-day conference, but it wasn’t the experience I expected so I’m still trying to figure out how to relay that information on the blog.
Have Fun With It
Ryan is a goofball. I absolutely love that about him – and it made for some great moments while I was taking pictures. Remember to laugh and smile, because at the end of the day, that’s how you’re going to capture the greatest pictures. Here were some of our “have fun with it moments”.


1) Our shadows. In that last picture he’s actually making a halo. I couldn’t figure out what he was doing.
2) Ryan being The Thinker.
3) Ryan being The Flash, aka Ghost Ryan.
So there you have it. I would definitely say that I made some progress over the past few months and I’m excited to see what happens next.