
My First Creativiu Cake Decorating Class (with Fondant!)
This post is sponsored by Creativiu. That said, all thoughts and opinions are my own. So enjoy
I recently had the chance to try out Creativiu’s online cake decorating class. Creativiu has online classes on-demand for creatives who want to enhance their baking skills. They offer classes on decorating your first master cake (the one I took), how to sculpt and airbrush cakes, how to creative impressive textures for cakes, and how to make a teddy bear cake.
Decorating your first master cake is taught by Beth Townsend; she recently won The Food Network’s cake Wars . The class is comprised of 7 lessons, each one of which has a video explaining exactly how to do one of the steps: (1) how to get the cake ready for decorating, (2) making the ganache, (3) making the decorative items, (4) working with fondant, (5) using buttercream and stacking the tiers, (6) adding your decorative items, and (7) airbrushing, glitter, and ribbons. My favorite part about these videos is that you can go back and watch them in real time to get all the information right when you need it.
Guys. I really enjoyed this class. Beth explains things really simply. She doesn’t make you feel like an idiot if you don’t know how to do something, for example, she explains how her first days of cake baking went. She also provides some really great tips. Things about what to do if you screw up, the best way to prepare the cake for decorating, and how to store all of your ingredients. I watched all of the videos ahead of time (kind of like my own personal Food Network show) just to make sure I knew what I was getting myself into and felt much better prepared for the outcome.
This class provides you all of the building blocks to make a fantastic cake. I would recommend this course to somebody who has already baked a few cakes, has tried their hand at buttercream frosting once or twice, and is ready to take their skills to the next level. After taking this class I feel prepared to cover a cake in buttercream roses, a decently solid fondant, or even to make gum paste flowers as decorations. That said, I definitely wouldn’t recommend taking this course in order to make somebody bridal shower for the first time. Try it out first, see how it all feels, and then take your skills to the streets.
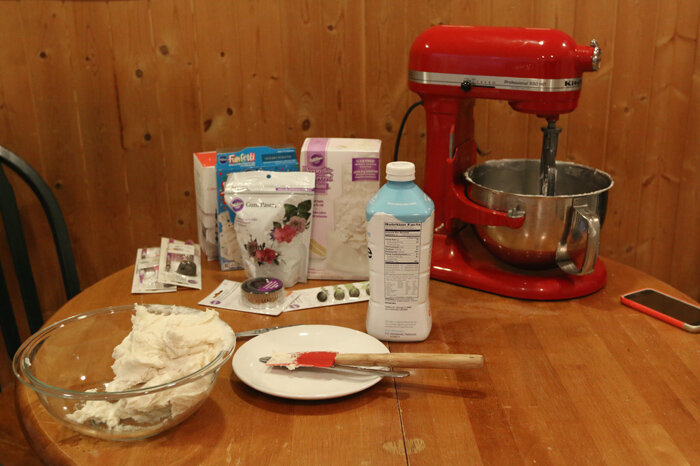
I went to Michaels on Black Friday to buy all of my cake decorating supplies for my cake decorating class. The video tells you about a lot of different options. My suggestion would be to plan what you want your cake to look like ahead of time so you get exactly what you need and no extra. For example, I decided right up front that I wasn’t going to use the gold leaf powder on this cake, but I could definitely see how it would be something fun to use for the next time.
Also. One of the first things I learned was that you should bake your cakes a few days ahead of time and put them in the freezer so that they’re easier to work with. So many good tips in this course, y’all.

I prepared my work station and got started on making all of the buttercream frosting. Toni, from Make Bake Celebrate, has an incredible post on buttercream 101. If you’ve ever had a doubt about buttercream frosting, you must read it. And as expected, her buttercream was delicious.
Lucky for me I already had some buttercream made from a few days prior so I only needed to make one extra batch.
Once it was finished I put it all together in the same bowl and set it aside.

Then it came time to make the ganache. Beth is a huge fan of ganache. And I’ve got to tell you. After using it once, I am now too. It adds a little something.


I made 2 funfetti cakes, one 8″ and one 9″ – and 2 chocolate peppermint cakes, one 8″ and one 9″. That way each layer had half chocolate peppermint and have funfetti in the same slice. I don’t think this is traditional, but it was definitely delicious. I prepared the cakes and buttercreamed the layers together. Then I ganached them. I’m pretty sure ganached isn’t a word.

Once the ganache dried, we added the buttercream. Just having the chance to watch Beth’s spatula techniques in the video definitely made this process feel easier. That said, Beth definitely has a spinning cake turntable in the video, which makes it extra easy to coat these cakes evenly. I decided for my first cake it wasn’t worth buying the turntable, but if this is something I decide to pick up as a serious hobby in the future that’s going to be one of my first purchases.


Then it came time to start with the fondant. Guys. This was my first time doing fondant. Beth had so many good tips about handling it for the first time, how to adhere it, and how to color it.

It was approximately then that Ben came downstairs and said to me (something along the lines of), “I thought the frosting on those cakes was supposed to be flat so that when the fondant went on it you couldn’t see any of the waves in the frosting.” Well, yes, that’s true. But my patience level isn’t super high. So Ben then took out his unnecessarily long knife from Japan to flatten the icing on these cakes.
Admittedly, they were much flatter when he was done.

This next photo looks kind of like a cake CSI scene, but I felt like I should include it. Here you go:

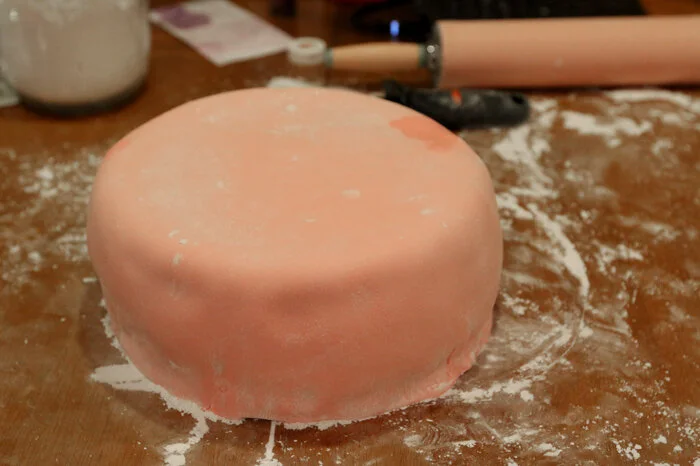
I definitely ended up adding about 5x that amount of dye to the fondant. Next time I’m going to do blue instead. Then I rolled it out. It’s times like this I wish my cake didn’t have a huge crack down the center (for a leaf). It didn’t mess it up too much though.

Since Ben was downstairs he was able to capture some of the photos of me working with the fondant to cover the cake for the first time. Yes, I did this whole thing while wearing pajamas. Don’t judge.


It turned out pretty well!
I covered both tiers and set them aside while I cleaned up the kitchen. (Beth was right, there’s seriously so much cleaning in cake decorating.)
(Do you like how I’m talking about me and my new friend Beth? Roll with me here.)

Then. Guys. You’re going to love this. CAKE DECORATING meets BUBBLE TEA meets ARCHITECTURAL ENGINEERING. If that combination of things doesn’t scream Chrystina, I don’t know what does. Apparently they sell these fancy cake dowel things that are nearly impossible to cut that you’re supposed to stick in a cake to support the bottom layers, but Beth uses bubble tea straws. So yes, a few days before I went to my favorite bubble tea shop and took a handful of straws with me. Mostly because I’m sure I’ve given them enough business in the past few years to be able to take some extra straws.

Then I stacked the cakes and used some of Beth’s tricks to make some decorative fondant elements.
(If you’re curious about the water drips down the sides of the cake you actually use water to get fondant to adhere to fondant. I think that because I used so much powdered sugar while rolling out the fondant that it actually caused the fondant to change color when it was hit with water. Before I served the cake I went over the whole outside of the cake with a brush and water. It seemed to help.)

I topped off the cake with some buttercream frosting. It was approximately at this point that I realized I should have made a blue cake to begin with because it would have looked better on the tray. Think about what tray you’re going to be serving these cakes on before you decide how you’re decorating it. That’s something else that I would add to the to-do-beforehand list. (That said, Beth used a cake stand. I used a tray because I forgot to buy a wooden cake stand plate thing. But it worked fine – at least for two tiers. Y’all wouldn’t believe how heavy this cake was, man.)

The next day I took my cake to the office. (Because that’s where people take extra cake, right?)
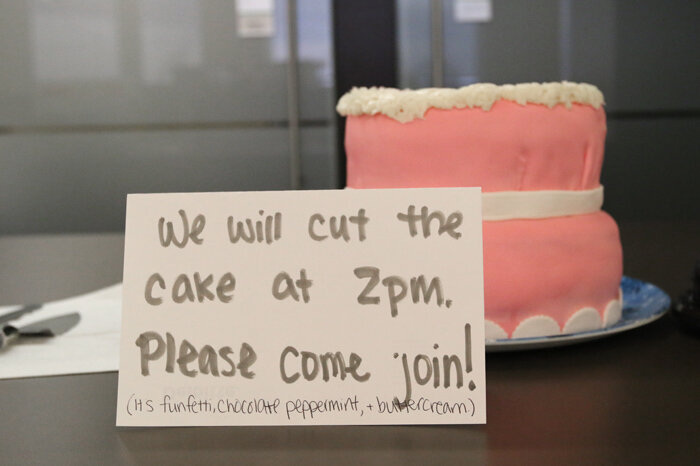
It turned out well! I was pretty impressed. And one person even asked me if I can make a bridal shower cake. To which I said, “we’ll see.” But. It’s cool to think I might have another side hustle. (Because we all know you can never have too many of those, right?)

TA-DA! My first multi-layer, multi-tier, fondant-covered cake. If you’re interested in taking your cake skills to the next level, the cake decorating class at Creativiu is currently on sale for $19.95. Beth has a lot of great instruction and tips that I was able to use throughout the cake decorating process. You can gift it to someone for the holidays (especially if you want them to bake you cake) or you can work on your holiday baking skills. If you have any questions, feel free to leave them below and I’ll answer.
Have you ever made a cake like this? What was your experience? Did your fondant have as many pleats as mine did? I tried to cover them with a “ribbon.” It almost worked I’m sure. Until I told you. And now you’re all going to scroll back up and look at it. Can’t be perfect, right?